This is the biggie. The construction of an outdoor fireplace and wood-burning pizza/bread oven. HUGE project…14 feet long, 11 feet high at the top of the chimney. I don’t know what I was thinking. You may have noticed the absence of a date from the title of this post. This is because it was begun July 2009 and here, in May 2010 I’m STILL WORKING ON IT! Granted I’ve had a few distractions and major projects for friends in the interim. But I’m still plugging along…
A unit this huge needs a serious foundation. I am hoping (fingers crossed!) that a 6″ slab reinforced with 1/2″ rebar (the thick kind), and water-cured to slow down the curing process, will suffice. If I’m wrong, the foundation will crack beneath the weight of the fireplace, the fireplace will tear itself a part, and I’ll have a HUGE mess to clean up.
Again, the 6″ foundation form was built with lumber from the deck, so that was free. 1/2″ rebar comes in 20′ sections at Home Depot for about $8. I brought my bolt cutters and cut it into the appropriate lengths in the parking lot, and then drove it home. Ideally, to prevent water from pooling beneath the slab, you want to dig down a few inches and fill that space with compacted gravel. Did I do that? Nope. Would a contractor? Possibly, but probably not. It’s the right thing to do, but I was so nervous about pouring a slab of this size that I tossed down a bit of landscape fabric and gravel and got to mixing.
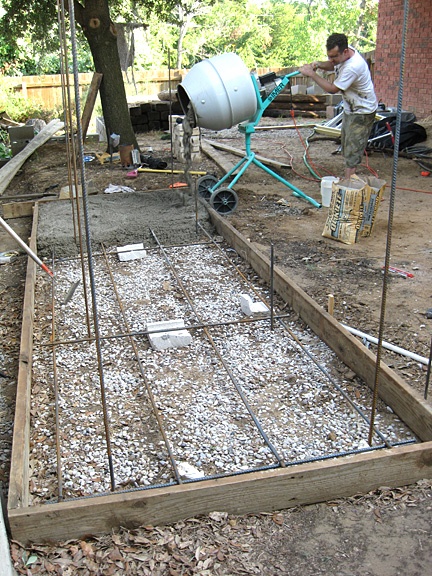
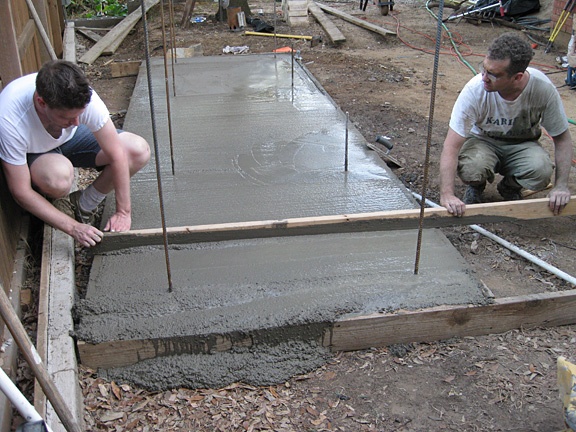
We’re talking 50 80-pound bags here, people! That’s 4,000 pounds of concrete that I single-handedly lifted into the mixer!!! I was really, really, really nervous about pouring 50 bags by myself, so I enlisted Chris and Christian to help. This was Christian’s first real effort in the renovation. (Chris has been helping all the time.) And he actually had a blast working with the concrete! It’s fun stuff.
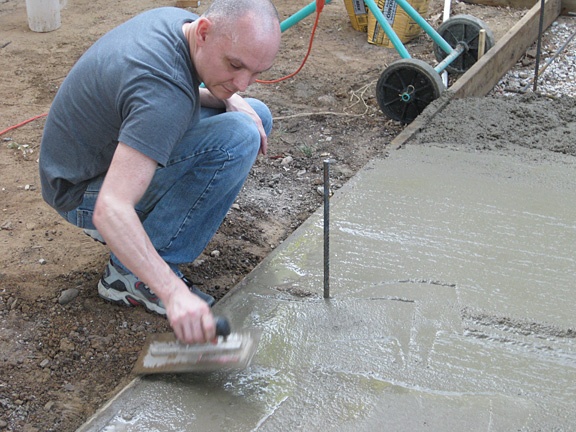
See that rebar sticking up out of the concrete? Those are anchors embedded into the slab that will reach up through the cinder blocks and tie the fireplace securely to the slab. Technically you don’t need them if you’re not in a earthquake zone (and we’re not, though we’ve had a couple of 3.0 tremors in the past few years!) but I’m really nervous about this project, so I did it anyway. You have to have your blueprints drawn out exactly, and you have to measure VERY carefully before you place this rebar. It must stick up directly into the holes (or “bays”) of the cinder blocks, so placement is critical.
I have meticulously sketched out each individual layer of cinder blocks all the way up to the chimney using graph paper, so I know exactly where these rebars should be. Does that make me any more confident when I pound them into the ground?
OF COURSE NOT! I practically soiled my pants, I was so nervous.
Just like before, you overfill the form, jiggle the concrete to get it to settle, then screed off the top using a 2×4. After it sets up a bit, you finish the edges with the edging tool, but you don’t have to do any surface finishing because we’re building on top of it.
After the concrete set up, I left the forms on it, covered it with heavy plastic, and let it sit overnight. The next morning, I drenched the slab in water and let it run between the form and the slab. I did this every few hours to help slow the evaporation of water, which makes the concrete cure more slowly. This increases its strength. Wet-curing or water-curing is used occasionally when it’s VERY important for concrete to be strong.
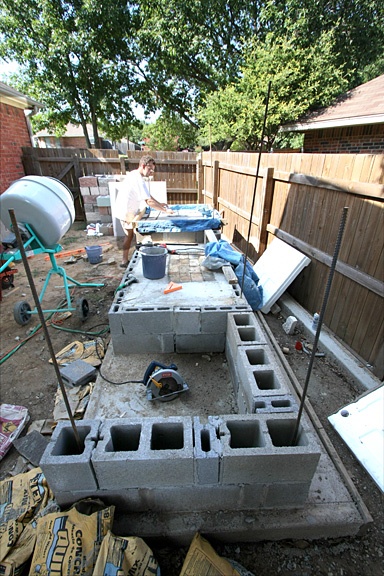
I let the slab cure for 2 weeks before building on it. Two layers of cinder blocks went down in the outline of the whole unit. (I’ve gotten loads of free or almost-free cinder blocks over the past couple of months by watching Craigslist like a hawk.) From left to right, there’s 4 feet of pizza oven, then 6 feet of fireplace, then 4 feet of wood storage.
This image is looking down the unit…I’m at the far end working on the pizza oven section.
The center section where the fireplace is was filled with rubble and styrofoam (I had saved up old Sonic cups and packing peanuts for this express purpose…keeps it out of the landfill and makes the whole unit lighter). When I had it filled to within 4″ of the top of the cinder block perimeter, I laid out rebar and poured concrete. Into the concrete, I embedded firebrick, a special kind of brick built to resist repeated high temperatures and rapidly fluctuating temperatures. Normal brick or cinder block would rapidly begin to flake and “spall” under these conditions, so we don’t want the fire to ever come in contact directly with the cinder block or concrete.
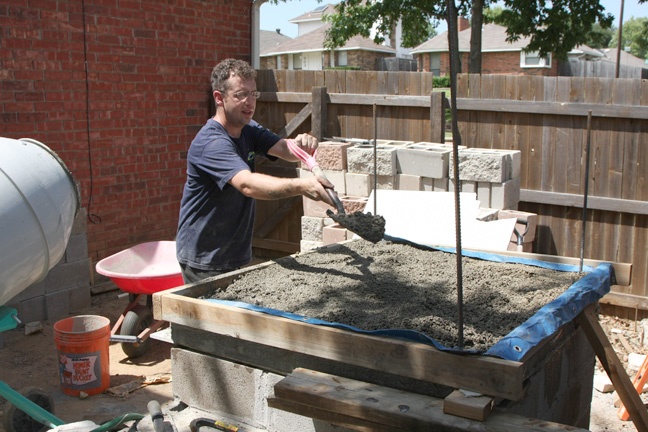
Next comes the foundation for the pizza oven. The oven is heavy, so I need a sturdy foundation. I laid a piece of 1/2″ cement board (HardiBacker…$30 at Home Depot) over the cinder block perimeter and I supported it from below with 2x4s. This layer I’m about to pour is going to weigh almost 700 pounds, so the cement board itself can’t support that weight until the concrete cures and can support itself. That’s why we have to prop it up from below with 2x4s.
Then I built the rebar reinforcement. To make sure concrete didn’t leak out between the form and the cement board, I also laid some old pieces of tarp along the edge. Then I poured the concrete.
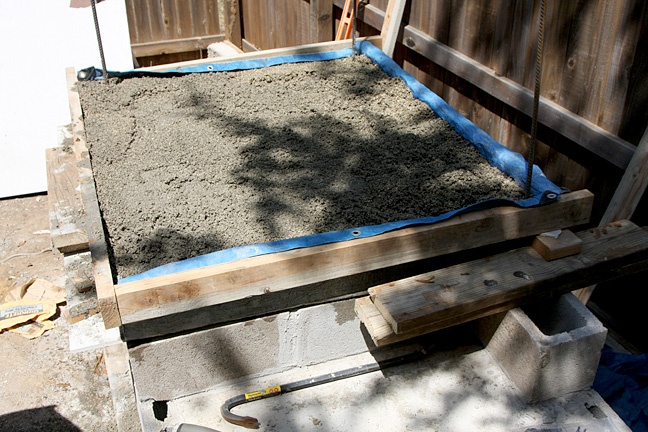
This 4-inch foundation layer required 8 80-pound bags of concrete. I covered it and let it cure for a few days before pouring the second layer…VERMICRETE!
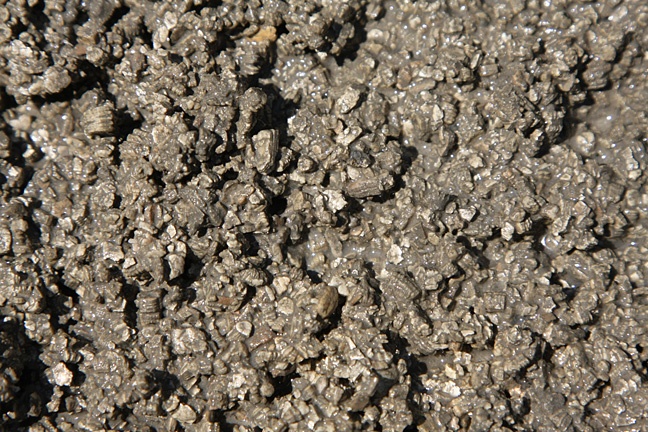
The key to a great pizza oven is a thick layer of dense material that holds the heat well from the fire, but that is surrounded by great insulation so the heat stays in the oven and temperatures can soar above 700 degrees. Concrete is a heat sink…heat sucks right into it and stays there. If we put the oven right on top of concrete, all the heat from the fire will suck down into the concrete and out into the cinder blocks, and we’ll burn through SO much wood trying to get the oven heated up because the heat is escaping into the foundation.
So…the solution is vermicrete! Vermicrete is a mixture of Portland cement (the basic ingredient in concrete) and vermiculite, which is an expanded volcanic glass. You know that volcanic rock called pumice that’s full of holes and really light? Well, vermiculite is similar, but much lighter, and it comes in little pills. You can buy small bags of it at garden supply stores, or HUGE bags of it at a feed store. I bought a 4 cubic-foot bag that was almost as big as me for $30, and it worked for the whole insulating layer.
To make vermicrete, you add 1 part of Portland cement to 5-6 parts of moist vermiculite. You mix it really well and dump it into the form.
This stuff is really, really light. The 4″ layer of vermicrete weighs about 60 pounds, while the 4″ layer of standard concrete below it weighs 700 pounds. It has an R value of just over 8, equivalent to a couple of inches of fiberglass insulation.
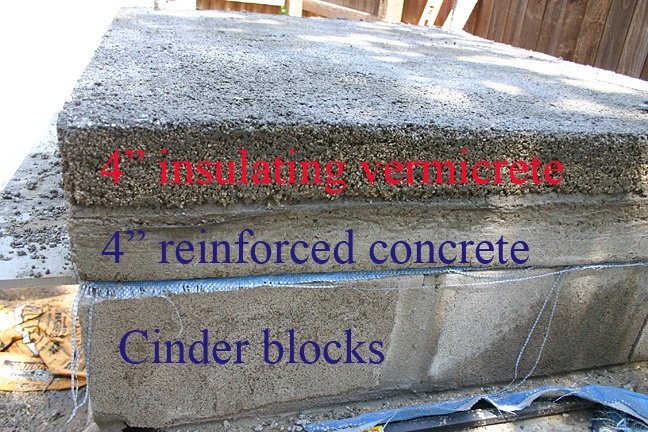
The foundation for the pizza oven is ready, but I’m going to put a separate blog entry for the construction of the oven. Let’s move on to the rest of the fireplace…
Any time you work with cinder block, you’ll have to make a cut every now and then. The easiest and most precise way is to use an angle grinder ($30 for a decent one) with a masonry cutoff blade. Don’t be stupid like me…wear a respirator when cutting because lots of silica dust is produced, and you DO NOT want silicosis of the lungs.
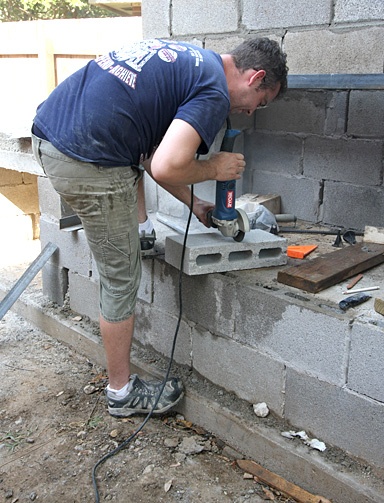
Score the block about 1/2″ deep, then turn it over and score the other side. Lay the block on the ground and tap it firmly with a hammer along the score line, turning it over occasionally, until the block cracks along the score line. Simple!
I lay a layer or two of block each day, working about 2 hours a day. Here I’m putting the finishing touches on layer 7.
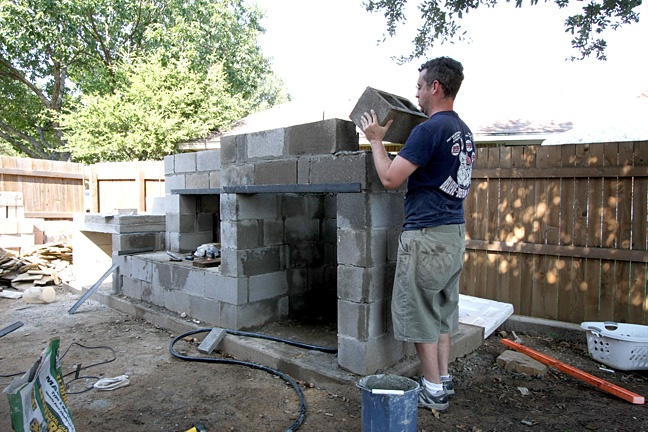
It’s starting to look like a fireplace structure now! Here you can see the layout, from left to right, the pizza oven foundation with its own wood storage area below, then the fireplace in the center, and the main wood storage area at far right.
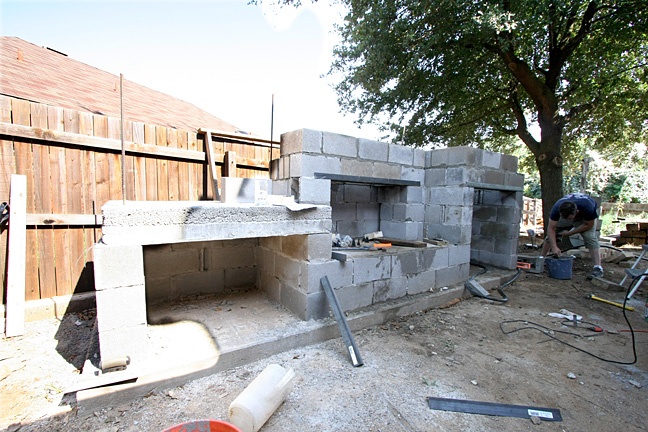
You can see angle irons above the openings for the fireplace and the wood storage. You need to use these across any unsupported span to anchor and support the cinder blocks. You use 2 for each span, so BOTH sides of the cinder block are supported. They will eventually be covered by stone veneer, so you won’t see them.
I’ve still got a long way to go on the fireplace. We’ll cover things like firebrick and flue tiles in a separate entry, and the pizza oven will have its own entry as well. For now, I’m just chugging along, a few hours a day, and it’s slowly coming together!
Leave a Reply
You must be logged in to post a comment.