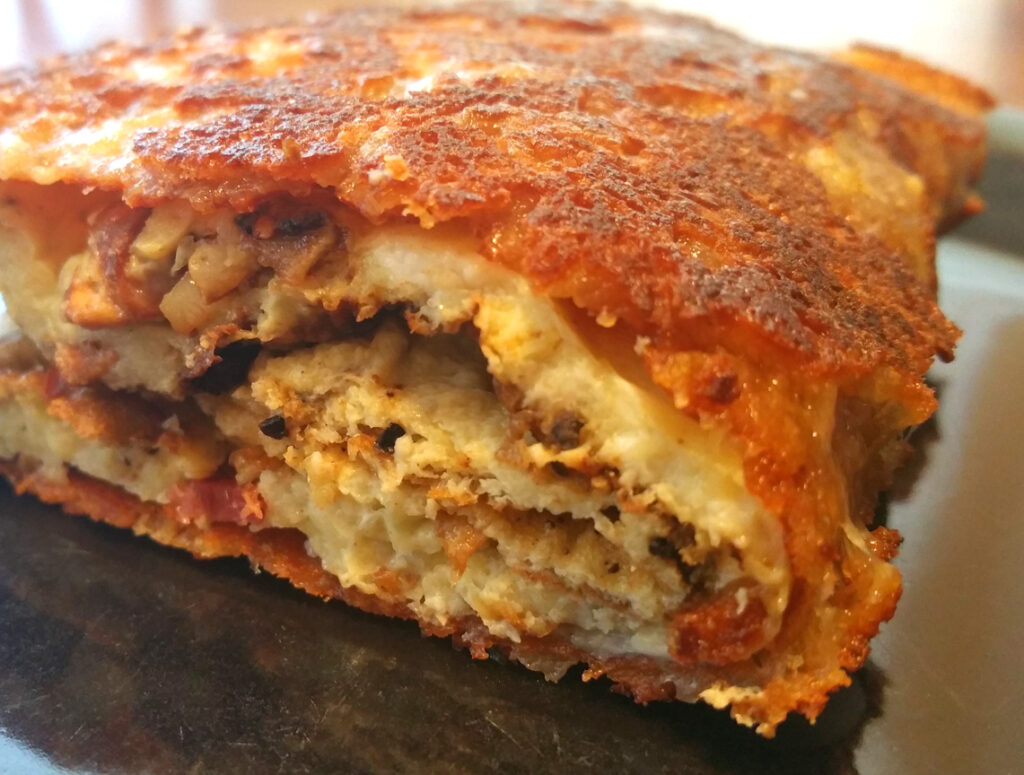
 Just imagine it…a delicious, fluffy omelet chock full of your favorite ingredients, but wrapped in a crispy, crunchy, savory crust of cheese. It’s way easier than you might think.
I’ve recently been making a lot of these unique omelets for breakfast, and decided to post the method, even though it’s pretty simple. But I haven’t really seen it anywhere, and as easy and delicious as it is, it should be everywhere!
You need 2 pieces of “special equipment” for this recipe, and you may already have both. You need a TRUE nonstick pan. Not the kind that’s been in your cabinet for 8 years getting scratched up. Nonstick pans aren’t built for longevity, you need a new one every few years. Don’t spend a lot of money on one, because you’re gonna be replacing it more often than your heavy duty clad pans or cast iron, which should last you forever with proper care.
I’ll admit, I’m not a huge fan of nonstick cookware. I keep a single pan for eggs, and that’s it. I also prefer the new generation of nonstick…the ceramic coatings or the “copper nonstick” pans that have been popular recently…to the old fashioned “Teflon” cookware that kills your parrots if it gets heated empty above 500 degrees. That’s creepy. This is the one I have, which I got on Amazon for about $20, but you can get them at any big box store that has kitchenware. This particular model works really well.
The other thing you need is a silicone spatula, which I’m sure you already have, but if your spatula is older and you aren’t certain that it’s made from silicone, don’t use it. Get one that is. The spatula will make direct contact with a VERY hot pan, and a conventional rubber spatula will melt into your omelet. That’s creepy. Luckily, most modern spatulas are made with silicone by default.
Now, this is a technique or method…not a recipe. You use your own favorite omelet recipe. My omelets are usually made with leftovers…whatever’s in the fridge. You name it, it works. Casseroles, cooked veggies, mashed potatoes, mac and cheese…anything. This morning I didn’t have any leftovers, but I did have fresh wild chanterelles from the park behind my house, and some bacon and garlic.
You’re also going to need cheese for the crust. Any cheese will do except for the high-moisture cheeses like fresh mozzarella, Brie, Camembert, etc. Even the cheap pre-shredded “sprinkle cheese” from the grocery store works beautifully, and that’s what I used today, but I’ve also used some rare 10-year aged cheddar from Wisconsin, with fabulous results.
First thing’s first…crack, scramble, and season your eggs. I use 4 eggs to yield 1 big omelet that I cut in half to serve 2. You can use as few as 2, but no more than 4, as the omelet will be too thick.
It’s important to always salt your eggs a few minutes before cooking them. The principle is the same as brining…the salt enters the cells of the egg and denatures the protein strands inside, causing them to fall into a jelly-like matrix that traps moisture, resulting in a moist, tender scramble. 15 minutes prior to cooking is ideal, but if you don’t have that long, even 5 minutes will produce better results. I also put a splash of water or milk into my eggs after beating them with salt…that extra moisture gets trapped into the protein matrix because of the salt, resulting in a lighter and ultra-moist texture.
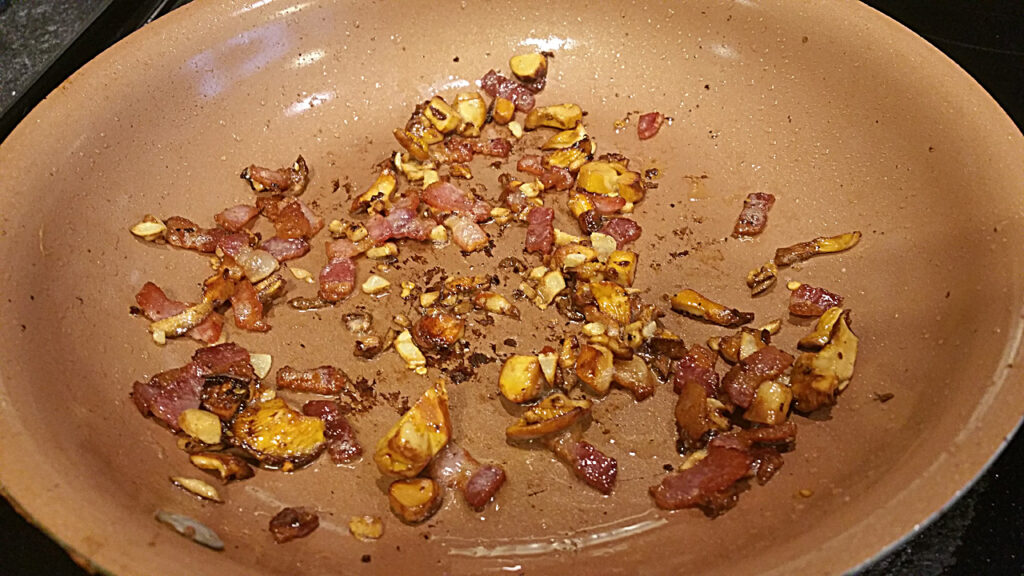
Cook any ingredients that need pre-cooking in your pan. (Leftovers can be pre-warmed in the microwave if they’re going to be stuffed in the center of the omelet.) Here I’ve got my bacon, chanterelles, and garlic ready to go, along with a sprinkle of red pepper flake:
Next, add your beaten and salted/seasoned eggs to the pan over medium heat. After a few seconds, use the spatula to pull the sides of the cooked egg back, letting more liquid egg run below it. Repeat this several times around the edge of the omelet. (This is nothing new…this is the regular method for cooking an omelet.)
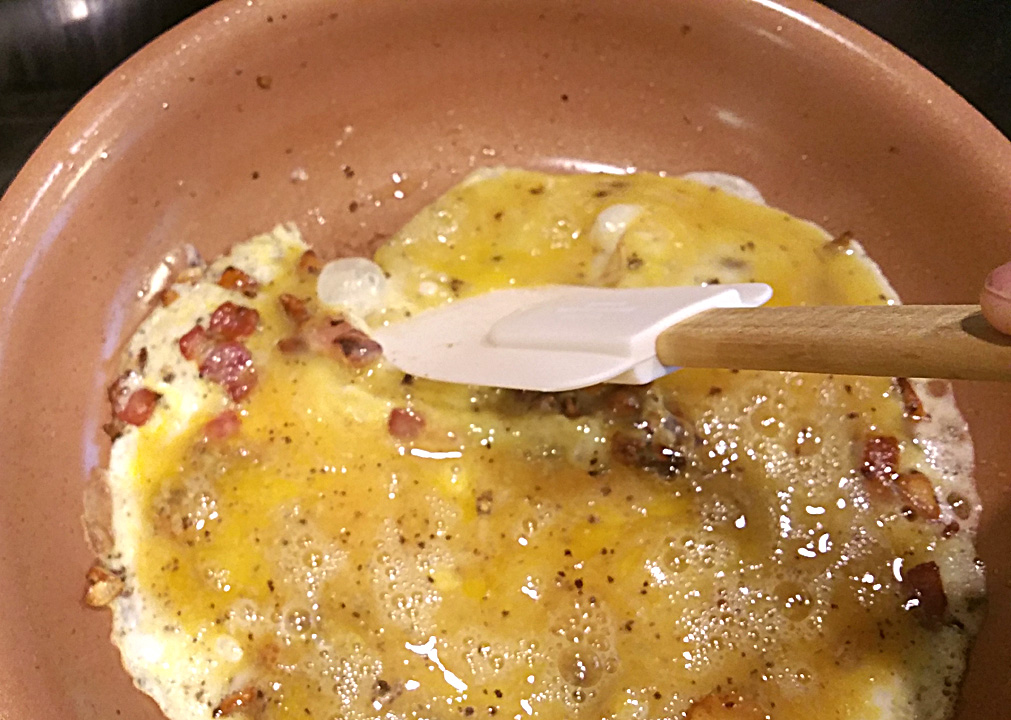
Soon, you’ll only have a thin film of uncooked egg on top of the omelet, like this:
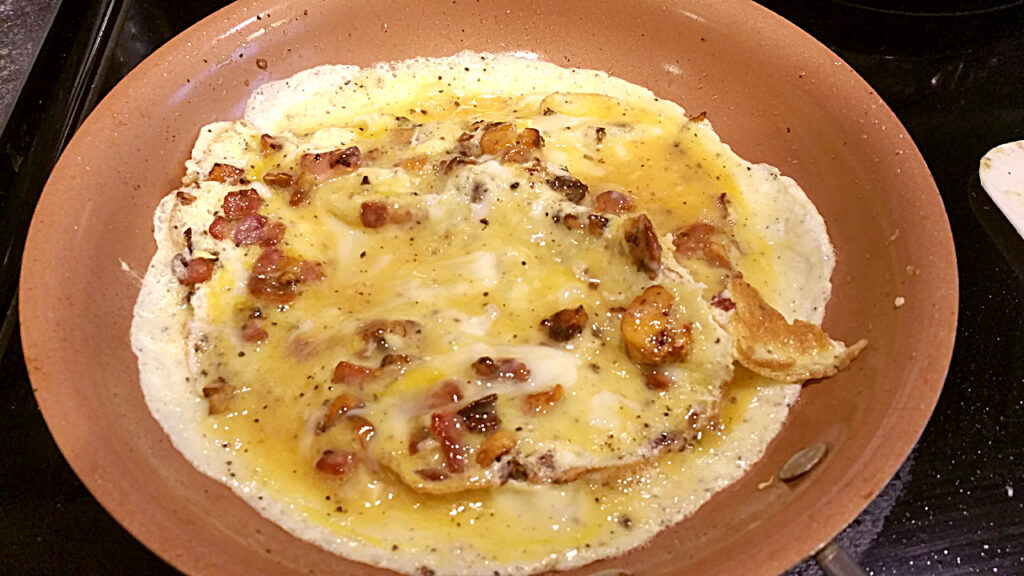
Then it’s time to slide the omelet out of the pan and onto a waiting plate. Gently run the spatula around the edge of the omelet and underneath to loosen it from the pan, and slide it gently (raw side up) onto a plate:
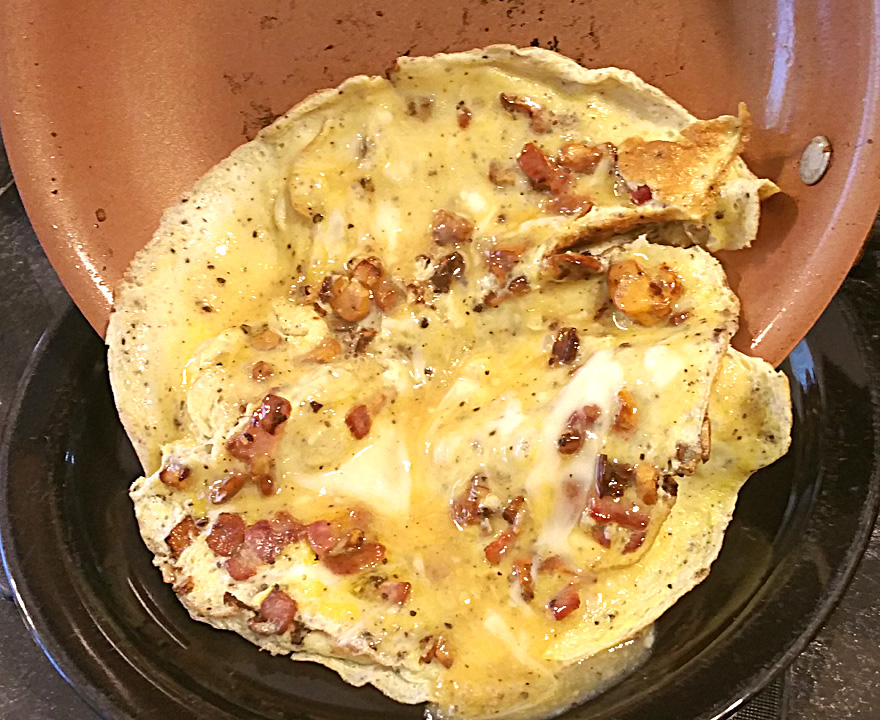 Now, if you pre-cooked any ingredients, you’ve probably got some fond stuck to your nonstick pan. (It happens to the best of us!) It looks like this:
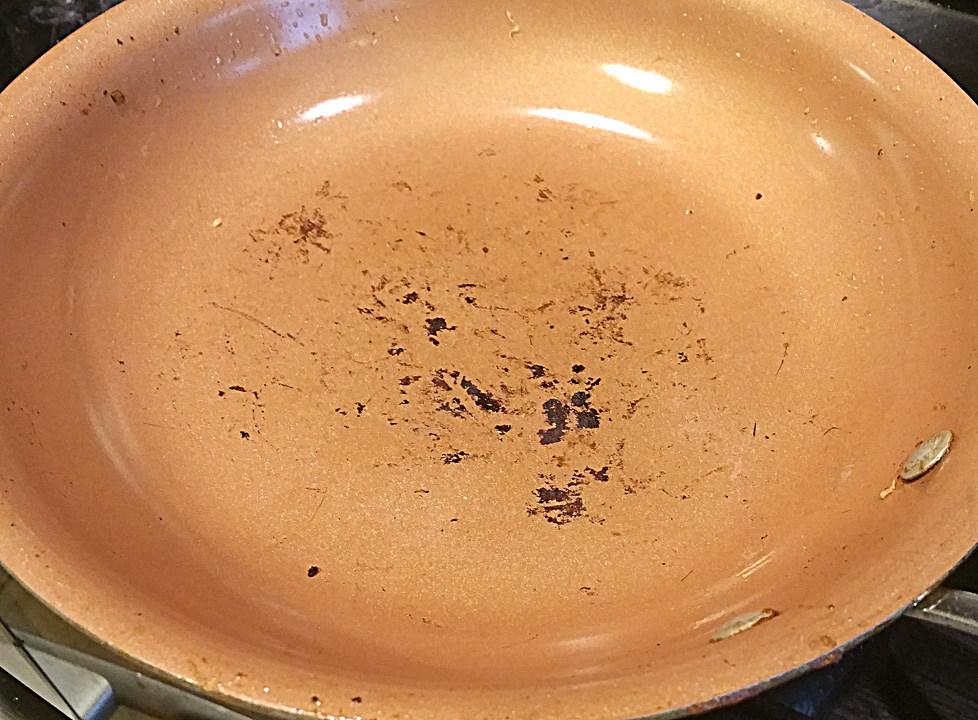 Your cheese crust layer is really delicate, and will stick to that fond, so to get rid of it, give the pan a brief spray of cooking spray, rub the fond with a wooden spoon to release it, then use a wad of paper towels to carefully wipe it out of the hot pan. Then give the pan another light spray of cooking spray, and sprinkle your cheese in a fairly thick layer on the bottom of the pan. You don’t want to see any pan showing between the shreds of cheese. The cheese will cook very quickly, so be ready!
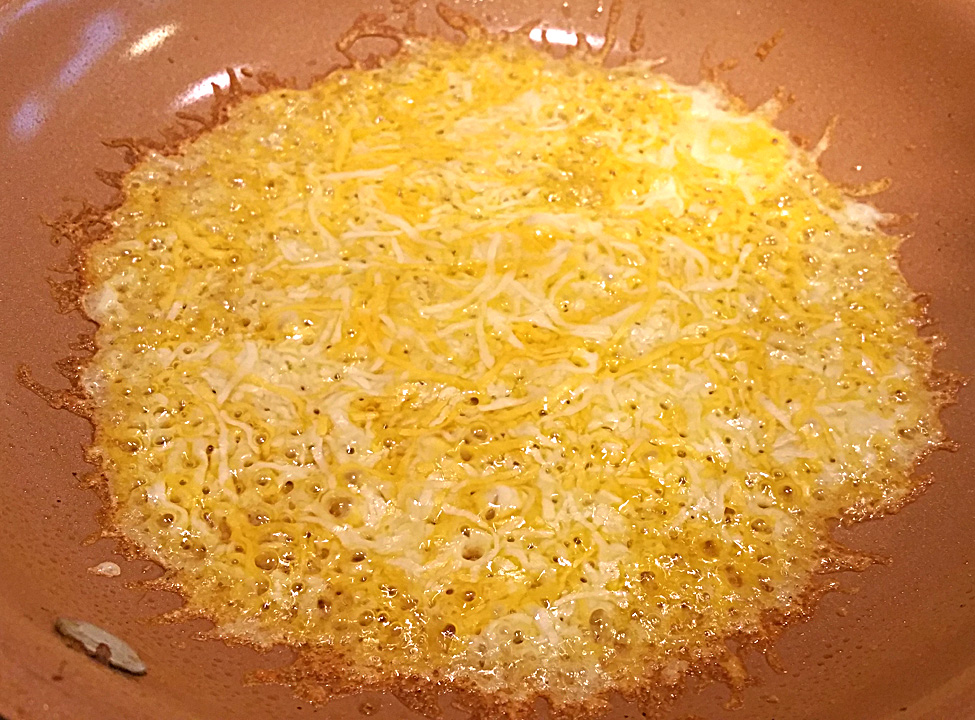 When you see the edges of the cheese getting brown and crusty, it’s time to flip. Carefully run your spatula around the edge of the cheese to loosen it, and get it up under the cheese pancake until the whole thing releases. Then use the spatula to get up under there and flip it upside down:
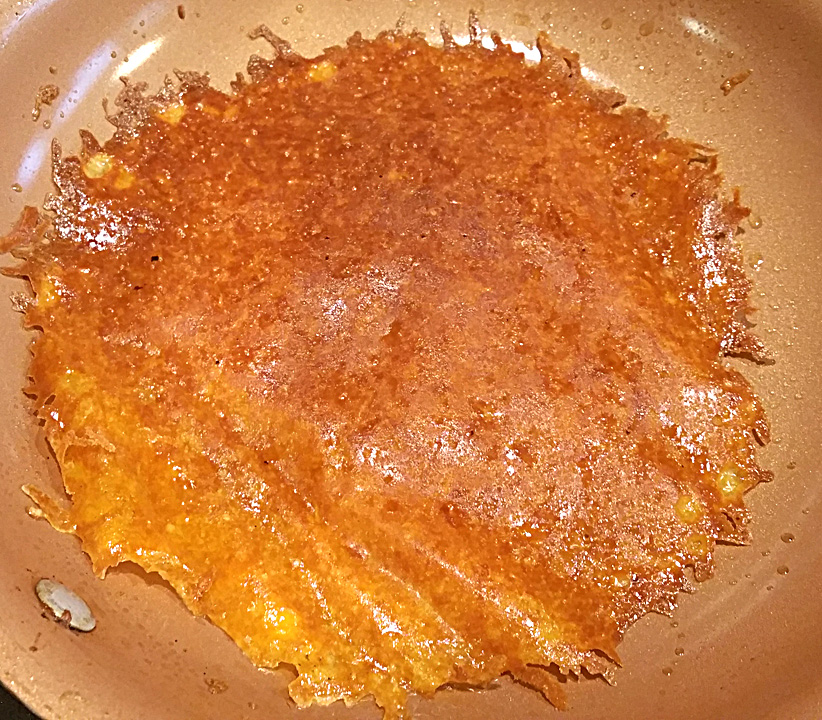 At this point you can put a paper towel on top of the cheese and press it with the spatula to absorb extra fat. Depending on the variety, the cheese will release quite a bit of fat into the pan. It’s yummy, but it’s also saturated fat.
Working quickly, flip the omelet raw-side-down from the plate onto the cheese:
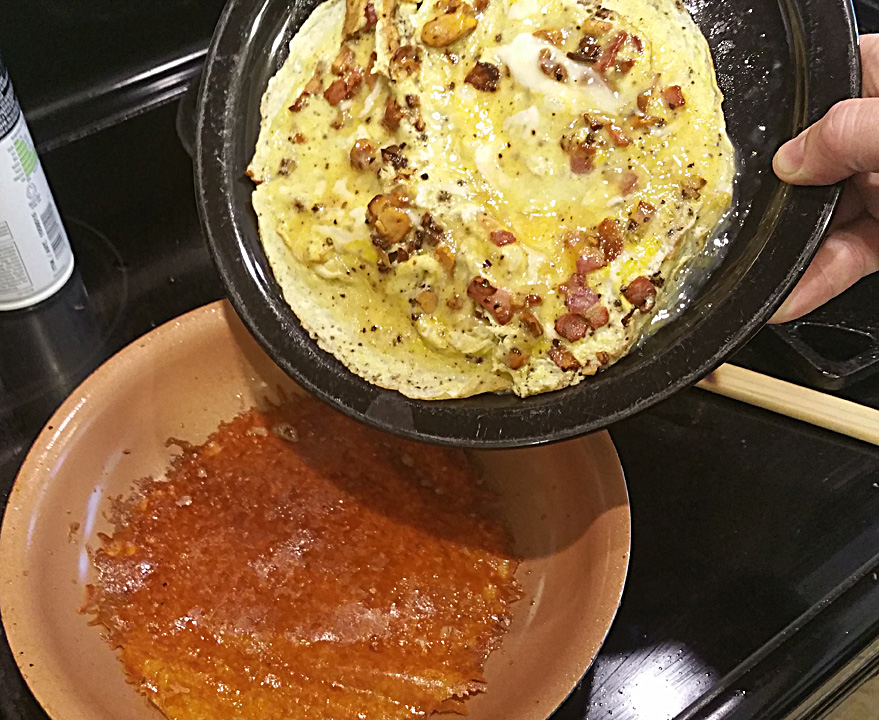 Give the whole thing a gentle press to help “marry” the omelet to the cheese, and cook it for another 30-60 seconds. Then slide the entire omelet, cheese-side down, onto a paper towel-lined plate to absorb extra fat. If you are filling the omelet, this is the time to do it. Then use your spatula to fold the omelet in half:
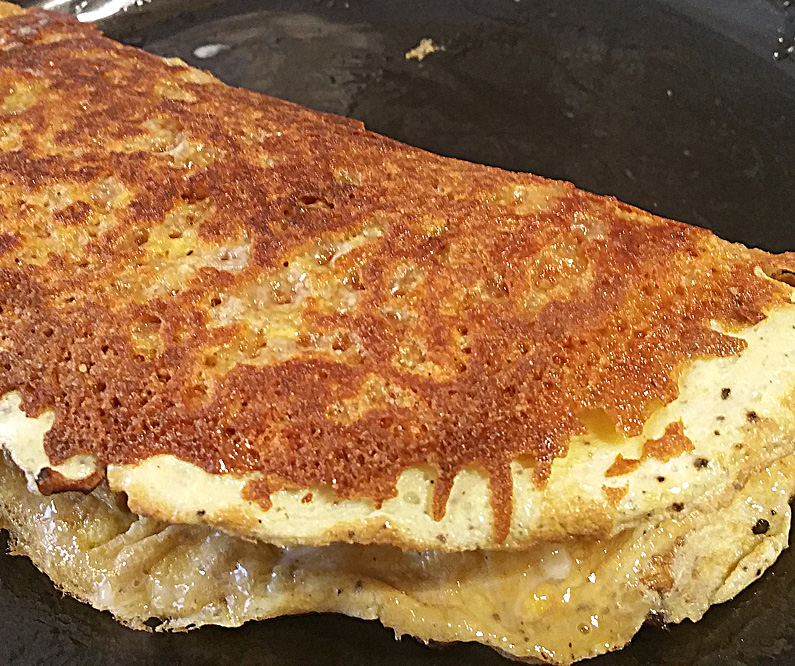
If you made a 4-egg omelet, slice it in half, and serve it immediately! This omelet is a little over-done, but omelets cook very fast, and when you’re trying to photograph AND cook, it takes a bit longer!

Leave a Reply
You must be logged in to post a comment.